Marbled Vanilla Chocolate Cake
Highlighted under: Indulgent Dessert Recipes
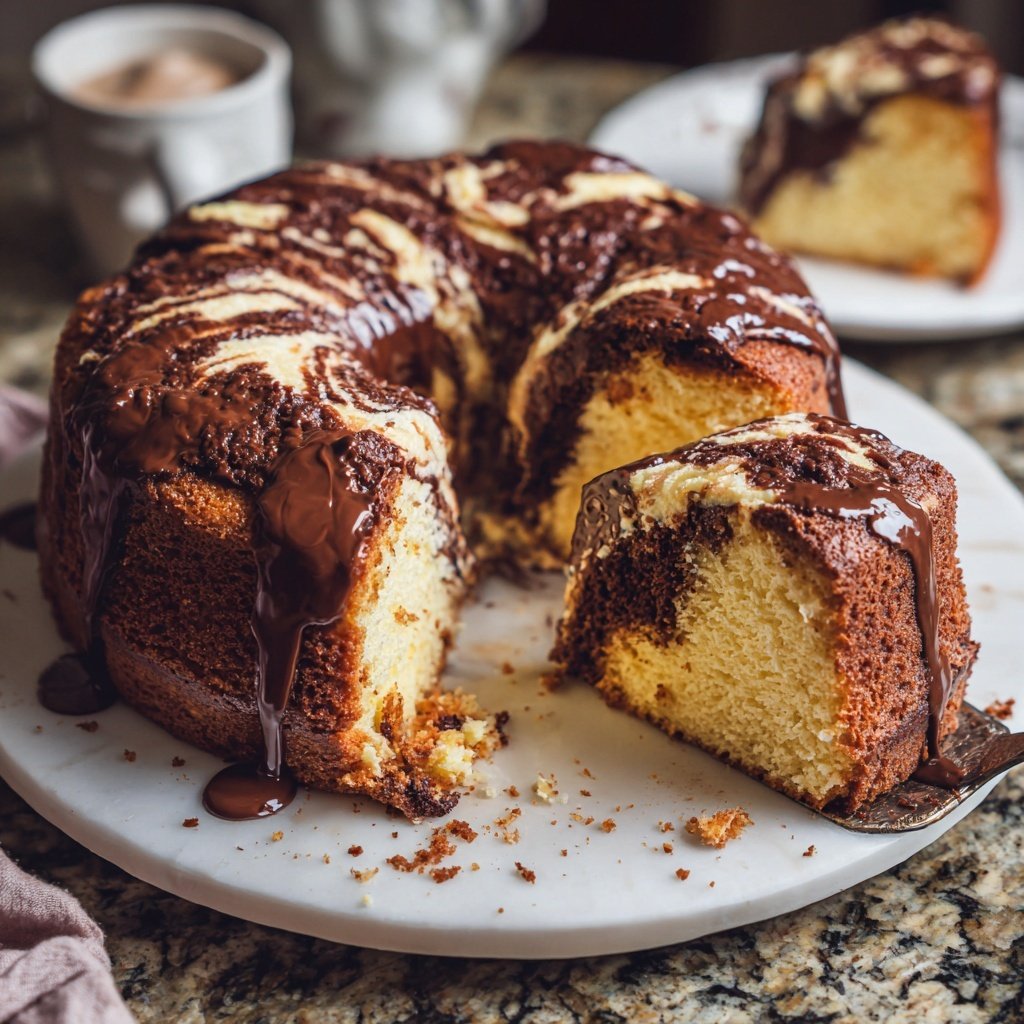
I can't stress enough how much joy I get from baking this Marbled Vanilla Chocolate Cake. The combination of rich chocolate and subtle vanilla flavors has made it a go-to for both special occasions and casual gatherings in my home. The way the two batters intertwine creates such a stunning visual that impresses everyone. Plus, it's surprisingly easy to whip up, making it perfect for both seasoned baking enthusiasts and novices alike. Trust me, once you try it, it will become a cherished recipe in your collection.
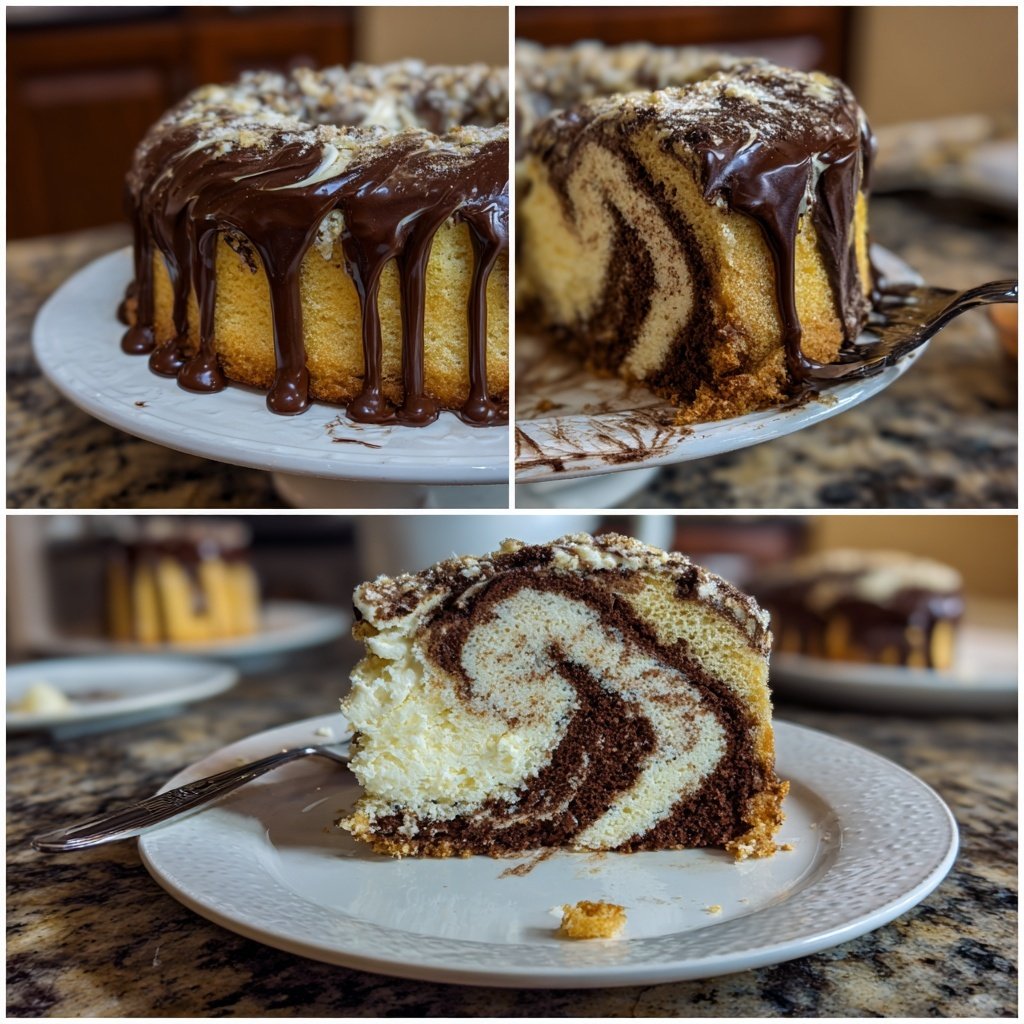
When I first decided to blend vanilla and chocolate in this cake, I knew I was onto something special. The swirling patterns not only look delightful but also create a perfect harmony of flavors with every bite. Baking this cake has taught me the importance of patience for the best marbled effect, and I often find myself experimenting with different ratios of vanilla to chocolate.
Using high-quality chocolate not only elevates the taste but also contributes to a fudgy texture that melts in your mouth. I recommend resisting the urge to overmix the batters; the beauty of a marbled cake lies in the contrasts, and a delicate hand will create the most stunning results.
Why You Will Love This Recipe
- Rich chocolate flavor paired with fresh vanilla essence
- Stunning marbled appearance that wows your guests
- A moist texture that stays fresh for days
Why the Ingredients Matter
Each ingredient in this Marbled Vanilla Chocolate Cake plays a crucial role in achieving that perfect texture and flavor balance. The combination of all-purpose flour and granulated sugar creates a light base, while unsalted butter adds richness and moisture. The eggs not only serve as a binding agent but also help the cake rise nicely. It's important to use room-temperature ingredients to promote even mixing and a fluffy texture, so consider taking your butter and eggs out ahead of time.
Cocoa powder is the star of the chocolate layer, contributing depth and a rich flavor profile. Be sure to choose a high-quality cocoa to ensure the best results. If you prefer a deeper chocolate flavor or a hint of bitterness, Dutch-processed cocoa can be substituted for regular cocoa powder. Just keep in mind that this will slightly alter the leavening, so you may want to adjust baking powder quantities accordingly.
Vanilla extract is indispensable for layering the flavors. Opting for pure vanilla extract, rather than imitation vanilla, will provide a more authentic and vivid taste. It’s that nuanced flavor that pulls the entire cake together. If you want to switch things up, try adding a bit of almond extract to the vanilla batter for a unique twist; just use it sparingly, as it can be quite potent.
Techniques for a Perfect Marble
Achieving a beautiful marbled effect is part of the charm of this cake. When pouring the batters into the pan, it's essential to do it gently to avoid deflating the fluffy texture you worked hard to achieve. Pouring in layers, as described in the steps, helps with this. If you want a defined swirl rather than a blended mix, use a skewer to create distinct lines, but don’t overdo it; too much swirling can result in a muddled look.
The baking process is just as critical. Keep an eye on the cake as it approaches the 30-minute mark, as oven temperatures can vary. The cake is done when the edges pull away from the pan and a toothpick inserted into the center comes out clean or with a few moist crumbs. Letting the cake cool in the pan for the suggested 10 minutes before transferring it to a wire rack is vital to prevent it from breaking; a quick release ensures a delicate crumb structure.
Once cooled, this cake can be served plain to showcase its stunning marbling or dressed up with a simple dusting of powdered sugar or a drizzle of chocolate ganache. For an even more indulgent treat, consider pairing it with whipped cream or a scoop of vanilla ice cream to complement the cake's flavors.
Ingredients
Gather these ingredients before you start baking:
Ingredients for the Cake
- 1 cup all-purpose flour
- 1 cup granulated sugar
- 1/2 cup unsalted butter, softened
- 2 large eggs
- 1/2 cup milk
- 1/2 cup cocoa powder
- 1 teaspoon baking powder
- 1 teaspoon vanilla extract
- 1/4 teaspoon salt
Make sure to measure your ingredients accurately for the best results!
Instructions
Follow these steps to create your delicious Marbled Vanilla Chocolate Cake:
Preheat and Prepare
Preheat your oven to 350°F (175°C). Grease and flour an 8-inch round cake pan.
Mix the Vanilla Batter
In a bowl, cream together the butter and sugar until light and fluffy. Beat in the eggs one at a time, then stir in vanilla extract. Gradually add the flour, baking powder, and salt until smooth. Finally, stir in the milk until well combined.
Mix the Chocolate Batter
In another bowl, combine the cocoa powder with a bit of hot water to create a smooth paste. Then, follow the same procedure as the vanilla batter: cream together butter and sugar, add eggs and cocoa mixture, and slowly incorporate dry ingredients.
Marble the Batters
Pour half of the vanilla batter into the prepared pan, then half of the chocolate batter. Repeat, creating a layered effect. Use a knife or skewer to gently swirl the batters together to create a marbled pattern.
Bake
Bake for 30 minutes, or until a toothpick inserted into the center comes out clean. Let the cake cool in the pan for 10 minutes before transferring to a wire rack.
Let your beautiful cake cool completely before frosting if desired!
Pro Tips
- For an extra touch, you could top this cake with a simple chocolate ganache or a dusting of powdered sugar.
Storing and Serving Tips
To keep your Marbled Vanilla Chocolate Cake fresh, wrap it tightly in plastic wrap or store it in an airtight container at room temperature. This will help maintain its moisture for up to three days. If you want to keep it longer, you can freeze individual slices wrapped in plastic and stored in a freezer-safe bag. When you're ready to enjoy, just thaw it overnight in the refrigerator or at room temperature for a few hours.
For serving, traditional slices with a side of coffee or tea are delightful. However, this cake can also shine as a dessert centerpiece at a celebration. Consider adding layers of flavored frosting between the tiers if you plan to make a multi-layer version for a special occasion. Pairing it with fresh berries can add a beautiful contrast and elevate the flavors of the chocolate and vanilla.
You can also experiment with toppings and flavor combinations. Crushed nuts, chocolate shavings, or even a sprinkle of sea salt on top can add a lovely crunch and enhance the overall dessert experience. Just be sure not to overpower the core flavors of the cake, as they are meant to shine.
Troubleshooting Common Issues
One common issue that bakers face is a cake that sinks in the middle. This can happen if the egg mixture is overmixed or if the oven temperature is too low. Always follow the baking times closely and check your oven's accuracy with an oven thermometer. If your cake does come out a bit sunken, don’t fret; a dusting of powdered sugar or a dollop of cream can easily disguise it when serving.
Another concern might be a dry cake. This could occur due to overbaking or incorrect measuring of flour. Ensure you spoon the flour into your measuring cup without packing it down, as this can lead to excess flour and a denser cake. If you suspect it’s overbaked, reduce the baking time by a few minutes and check for doneness earlier next time.
If the marbled effect isn't what you envisioned, don’t be discouraged. Practice makes perfect! You can always make a cupcake version of this recipe to practice your swirling technique. Cupcakes bake faster, providing more immediate feedback on your marbling skill, while also being a delightful treat for gatherings or for enjoying through the week.
Questions About Recipes
→ Can I use a different type of flour?
Yes, you can substitute with gluten-free flour, but the texture may vary.
→ How do I store leftover cake?
Store in an airtight container at room temperature for up to 3 days, or refrigerate for 5 days.
→ Can I freeze the cake?
Yes, you can freeze the cake. Wrap it tightly in plastic wrap and foil for up to 3 months.
→ What can I substitute for eggs?
You can use flaxseed meal mixed with water or commercial egg replacers for a vegan option.
Marbled Vanilla Chocolate Cake
Created by: The Nestflavory Team
Recipe Type: Indulgent Dessert Recipes
Skill Level: Intermediate
Final Quantity: 8 slices
What You'll Need
Ingredients for the Cake
- 1 cup all-purpose flour
- 1 cup granulated sugar
- 1/2 cup unsalted butter, softened
- 2 large eggs
- 1/2 cup milk
- 1/2 cup cocoa powder
- 1 teaspoon baking powder
- 1 teaspoon vanilla extract
- 1/4 teaspoon salt
How-To Steps
Preheat your oven to 350°F (175°C). Grease and flour an 8-inch round cake pan.
In a bowl, cream together the butter and sugar until light and fluffy. Beat in the eggs one at a time, then stir in vanilla extract. Gradually add the flour, baking powder, and salt until smooth. Finally, stir in the milk until well combined.
In another bowl, combine the cocoa powder with a bit of hot water to create a smooth paste. Then, follow the same procedure as the vanilla batter: cream together butter and sugar, add eggs and cocoa mixture, and slowly incorporate dry ingredients.
Pour half of the vanilla batter into the prepared pan, then half of the chocolate batter. Repeat, creating a layered effect. Use a knife or skewer to gently swirl the batters together to create a marbled pattern.
Bake for 30 minutes, or until a toothpick inserted into the center comes out clean. Let the cake cool in the pan for 10 minutes before transferring to a wire rack.
Extra Tips
- For an extra touch, you could top this cake with a simple chocolate ganache or a dusting of powdered sugar.
Nutritional Breakdown (Per Serving)
- Calories: 380 kcal
- Total Fat: 26g
- Saturated Fat: 15g
- Cholesterol: 195mg
- Sodium: 85mg
- Total Carbohydrates: 32g
- Dietary Fiber: 3g
- Sugars: 24g
- Protein: 6g