Decadent Chocolate Cake Pops
Highlighted under: Indulgent Dessert Recipes
I absolutely adore making these Decadent Chocolate Cake Pops! They are the ultimate treat for any chocolate lover, bursting with rich flavor and a delightful crunch. Each bite is a little indulgence that transports me back to my childhood, where every sweet moment felt special. The best part? They're perfect for celebrations or just to satisfy a sweet craving, and I love sharing them with friends and family. I promise, once you try making these cake pops, you will cherish every delicious pop!
Every time I make these Decadent Chocolate Cake Pops, I can’t help but feel like a kid again. The thrilling process of crumbling cake and mixing it with frosting is oddly therapeutic and allows my creativity to shine. I’ve learned that incorporating a bit of unsweetened cocoa powder into the cake adds depth to the flavor, making the pops even more irresistible.
It's always a fun activity to involve the kids or friends in shaping and decorating the pops. I recommend using high-quality chocolate for the coating to enhance the overall taste. You’ll find that letting the chocolate harden properly makes for a satisfying crunch that complements the moist cake inside, making each pop a delightful treat!
Why You'll Love These Cake Pops
- Rich chocolate flavor paired with fresh orange zest
- Creamy texture that melts in your mouth
- Perfect for celebrations or as a sweet indulgence
Mastering the Cake Mixture
The foundation of a great cake pop lies in the cake mixture itself. When you combine the crumbled chocolate cake with the frosting, aim for a consistency that holds together without being overly wet. You want to add the frosting a little at a time, mixing gently until the cake crumbs are just moistened. This method prevents the mixture from becoming too sticky, which can make shaping the pops difficult.
Moreover, ensure that the cake has cooled completely before crumbling. If it's still warm, it can cause the frosting to melt, leading to a soggy mixture. A good way to know if your cake is cooled is to touch the surface – it should feel just above room temperature. If you're short on time, making the cake a day in advance can save you some hassle!
Perfecting the Coating Technique
Melting the dark chocolate for coating your cake pops is crucial. If you're using a microwave, heat the chocolate in short bursts of 20-30 seconds, stirring in between until it's glossy and smooth. Be cautious to avoid overheating, as burned chocolate becomes gritty and unusable. Alternatively, using a double boiler gives you more control over the temperature, ensuring even melting.
When dipping your chilled cake pops, hold the stick and submerge the pop until it's fully coated. Gently tap the stick against the edge of the bowl to let any excess chocolate drip off before transferring it to the parchment-lined baking sheet. This helps achieve a neat finish and prevents pooling around the base of the pop, which can make them look less appealing.
Flavor and Texture Enhancements
To elevate the flavor of your cake pops, consider adding ingredients like orange zest to the cake mixture. The zesty brightness cuts through the rich chocolate, providing an unexpected burst of flavor that complements the sweetness. You can experiment with spices, like a pinch of cinnamon or espresso powder, to intensify the chocolate taste.
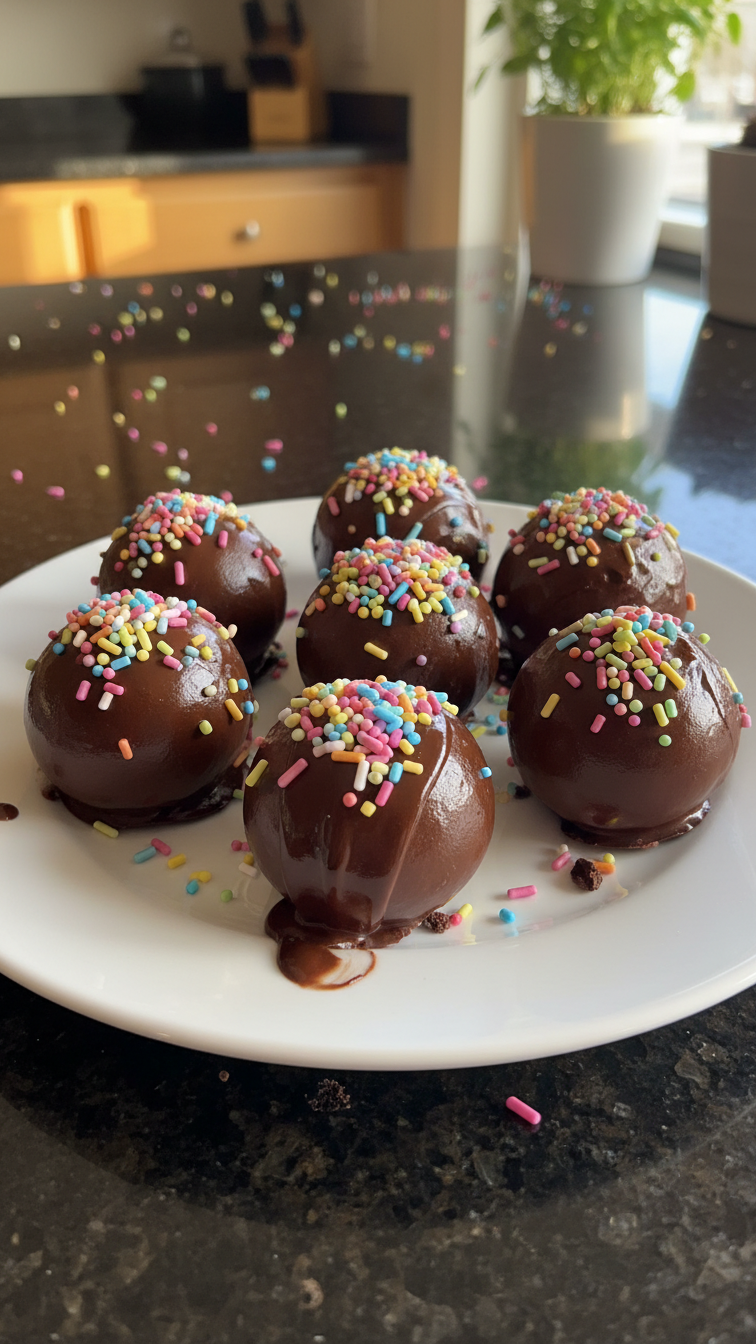
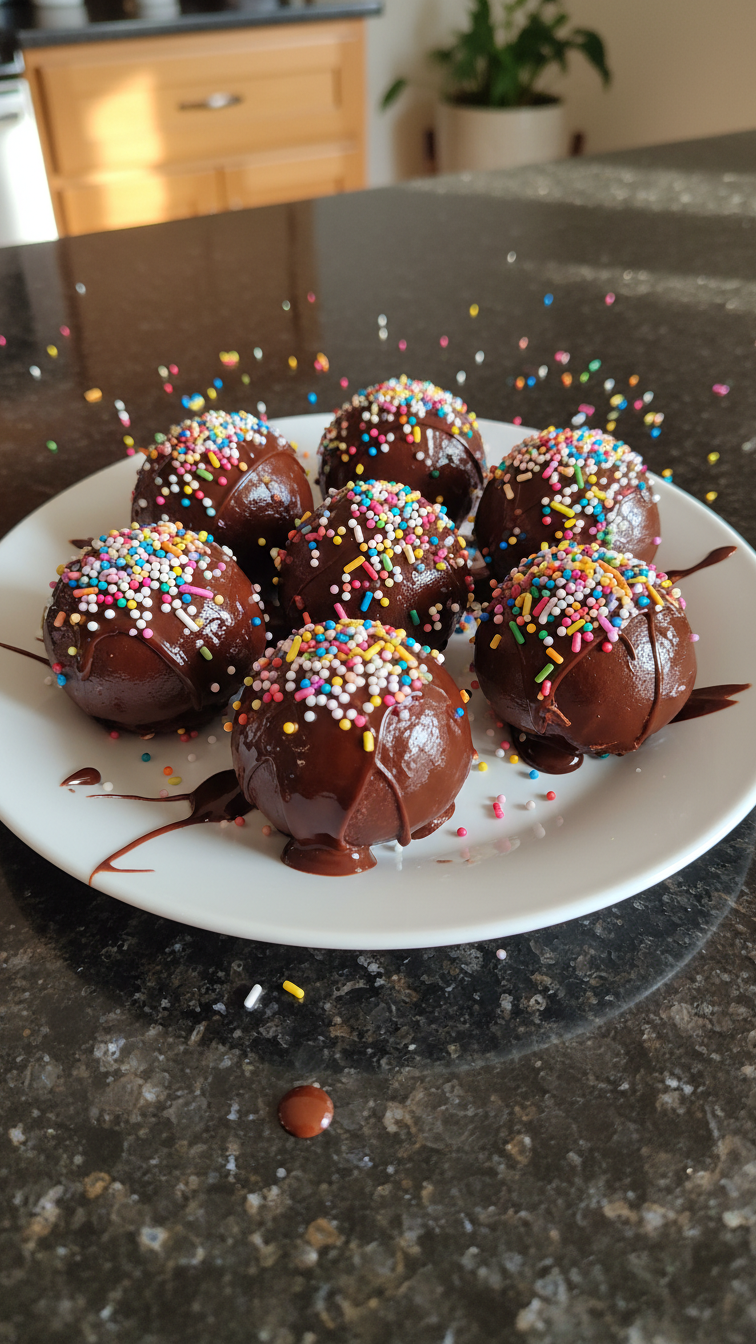
Once you've coated the pops in chocolate, allow them to set in a cool place (like the refrigerator) until firm. If you're looking to jazz up your decorations, try mixing different sprinkles or crushed nuts. Not only do they add a delightful crunch, but the variety will make your cake pops visually stunning and more enjoyable to eat!
Ingredients
Gather all your ingredients before you start for a smooth preparation!
For the Cake Pops
- 1 box of chocolate cake mix
- 1 cup of prepared chocolate frosting
- 8 oz of dark chocolate, for coating
- Sprinkles or crushed nuts, for decoration
- Lollipop sticks
Make sure everything is ready to go for the best results!
Instructions
Follow these steps carefully to create perfect cake pops!
Bake the Cake
Prepare the chocolate cake mix according to the package instructions and bake in a 9x13 inch pan. Allow it to cool completely.
Crumble the Cake
Once cooled, crumble the cake into a large bowl. Add the chocolate frosting gradually until the mixture is moist but not too wet.
Shape the Pops
Take small portions of the cake mixture and roll them into balls, about the size of a tablespoon. Insert lollipop sticks into each ball.
Chill the Pops
Place the shaped pops on a baking sheet lined with parchment paper and chill in the refrigerator for about 30 minutes.
Coat the Pops
Melt the dark chocolate in a microwave or double boiler. Dip each chilled cake pop into the chocolate until fully coated, allowing excess to drip off.
Decorate and Serve
Before the chocolate sets, sprinkle decorations on top. Allow the pops to cool and harden completely before serving.
Enjoy your homemade cake pops, perfect for sharing.
Pro Tips
- Experiment with different toppings and flavors to customize your cake pops. You can also try combining different types of chocolate for a unique twist!
Substitutions and Dietary Swaps
If you're looking for a gluten-free version of these cake pops, opt for a gluten-free chocolate cake mix. These mixes are widely available and yield a great texture without sacrificing flavor. Just make sure to check the chocolate frosting as well since some pre-made varieties may contain gluten.
For a dairy-free alternative, you can use vegan chocolate frosting and dark chocolate that is specifically labeled dairy-free. This small swap can allow those with dietary restrictions to indulge in these delicious treats and enjoy the same level of decadence without compromising on taste.
Make-Ahead and Storage Tips
If you want to prepare your cake pops in advance, you can chill the formed pops, as described, and then store them in an airtight container in the refrigerator for up to a week. Before serving, just coat them in chocolate and decorate. You can even freeze the uncoated cake balls for up to three months, thawing them in the fridge overnight before coating.
To ensure the best texture and flavor when serving frozen cake pops, avoid holding them at room temperature for too long. As they warm up, they can become overly soft and messy. Instead, serve them directly from the fridge for a delightful, cool treat.
Serving Ideas and Variations
Beyond basic chocolate coating, you can create themed cake pops for different occasions. For example, during holidays, use colored melting chocolates or themed sprinkles. Red and green for Christmas, pastel colors for Easter—this customization adds a personal touch to your treats and makes them more festive.
If you're feeling adventurous, try incorporating flavors like raspberry, mint, or almond extract into your cake mix or frosting for a unique twist. Not only does this enhance the flavor profile, but it allows you to experiment with combinations that could become your new favorites!
Questions About Recipes
→ Can I use any cake flavor?
Yes, you can use any flavor of cake mix or even homemade cake for these pops.
→ How do I store the cake pops?
Store them in an airtight container in the refrigerator for up to a week.
→ Can I freeze cake pops?
Absolutely! They freeze well. Just make sure they are fully hardened before placing them in a freezer-safe container.
→ What's the best way to melt the chocolate?
The best method is to use a double boiler to avoid burning the chocolate or use the microwave in short intervals, stirring in between.
Decadent Chocolate Cake Pops
Created by: The Nestflavory Team
Recipe Type: Indulgent Dessert Recipes
Skill Level: Medium
Final Quantity: 12 servings
What You'll Need
For the Cake Pops
- 1 box of chocolate cake mix
- 1 cup of prepared chocolate frosting
- 8 oz of dark chocolate, for coating
- Sprinkles or crushed nuts, for decoration
- Lollipop sticks
How-To Steps
Prepare the chocolate cake mix according to the package instructions and bake in a 9x13 inch pan. Allow it to cool completely.
Once cooled, crumble the cake into a large bowl. Add the chocolate frosting gradually until the mixture is moist but not too wet.
Take small portions of the cake mixture and roll them into balls, about the size of a tablespoon. Insert lollipop sticks into each ball.
Place the shaped pops on a baking sheet lined with parchment paper and chill in the refrigerator for about 30 minutes.
Melt the dark chocolate in a microwave or double boiler. Dip each chilled cake pop into the chocolate until fully coated, allowing excess to drip off.
Before the chocolate sets, sprinkle decorations on top. Allow the pops to cool and harden completely before serving.
Extra Tips
- Experiment with different toppings and flavors to customize your cake pops. You can also try combining different types of chocolate for a unique twist!
Nutritional Breakdown (Per Serving)
- Calories: 380 kcal
- Total Fat: 26g
- Saturated Fat: 15g
- Cholesterol: 195mg
- Sodium: 85mg
- Total Carbohydrates: 32g
- Dietary Fiber: 3g
- Sugars: 24g
- Protein: 6g